OM-1 In-Body Star Tracker
This post describes a firmware patch for the Olympus/OMDS OM-1 (and Mark II) camera that uses the in-body image stabilization actuators to track the stars in combination with a companion Android app. It works well for both wide-angle astro-landscape shots and super-telephoto shots with long exposures (tested up to 300 mm, 600 mm FF FOV equivalent).
This blog post was written by me (a human 😁), with some diagrams made with AI. The firmware patch and app were written entirely by AI.
The app and firmware patch are open source here.
Why are Star Trackers Needed?
Annoyingly for astrophotographers (but thankfully for everyone else), the Earth rotates at ~15 degrees per hour. This causes the stars to move and trail in long exposures (or even short exposures at longer focal lengths).
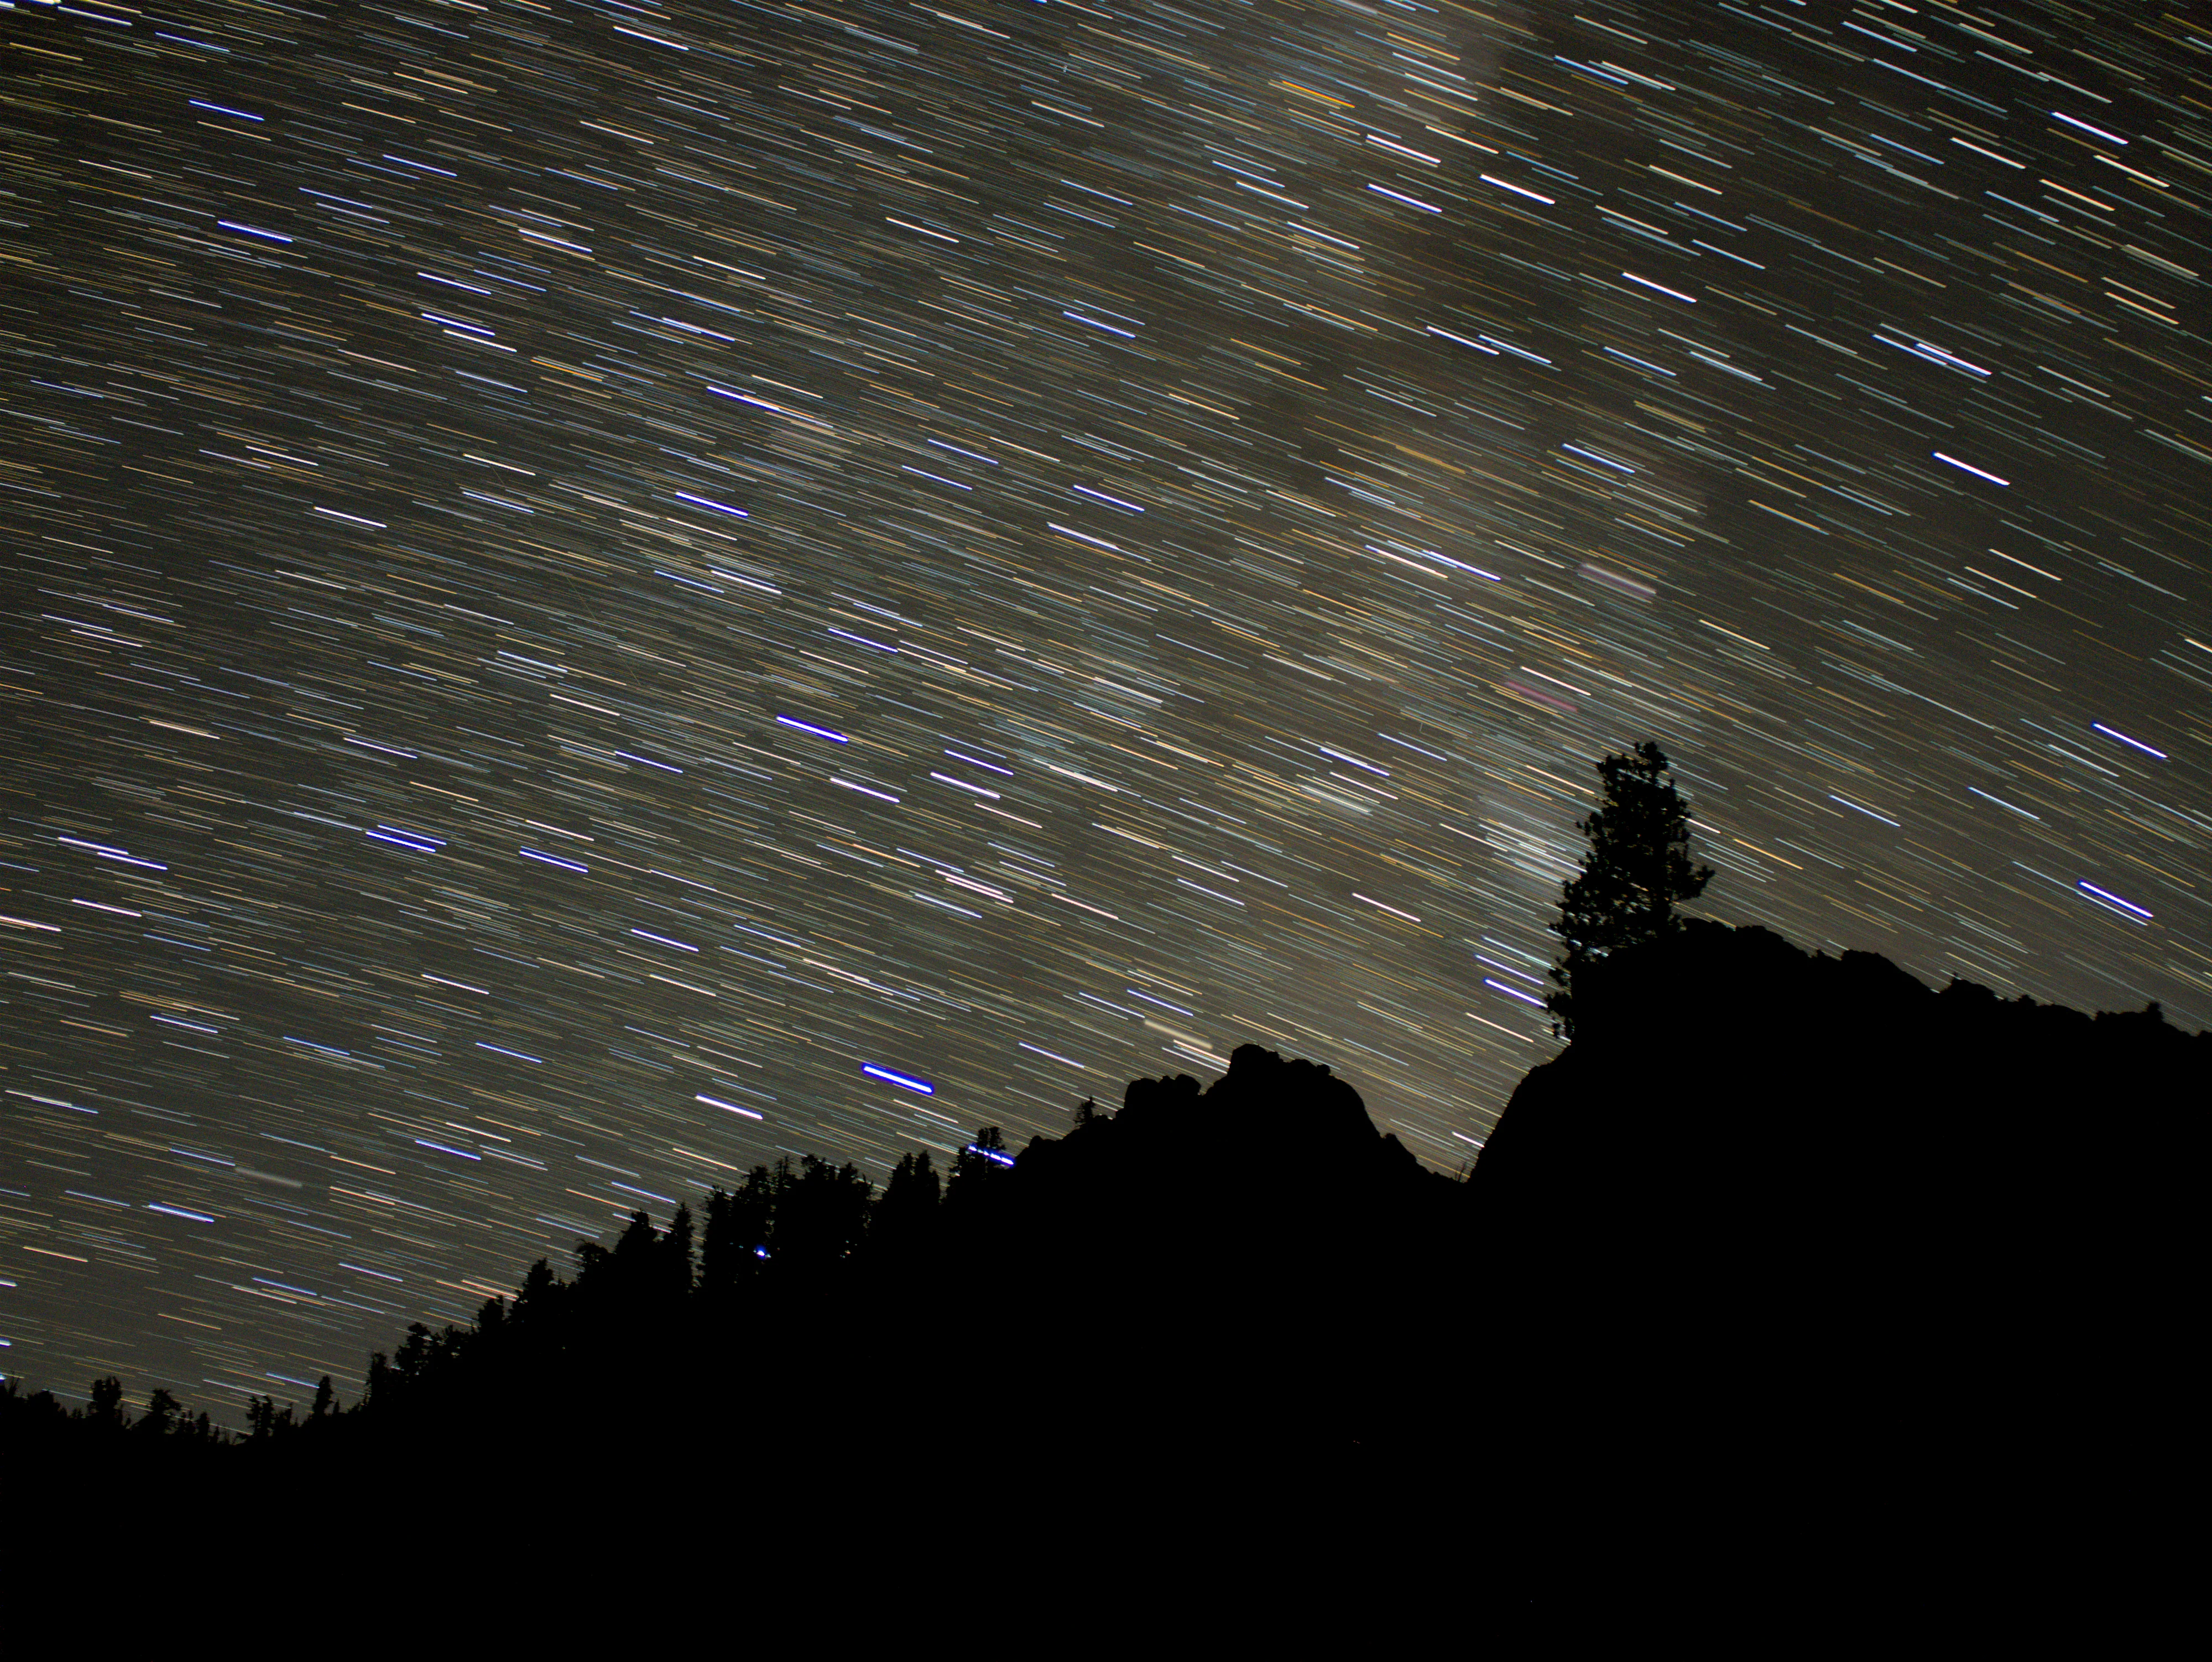
Star trails from Upper Twin Lakes, CA. ISO 3200, 25 mm f/2.0, 31 × 10 s stacked exposures (5 min 10 s total exposure).
The standard way to compensate for this is to use an equatorial tracker, which is just a slow motor/gearbox that, when aligned with the Earth’s rotation axis, cancels out the rotation. Trackers are usually pretty heavy and require a finicky alignment process.
However, a camera should actually be able to do it by itself: the camera can figure out where it’s pointing by taking a photo, and the camera can also physically shift/rotate the sensor for image stabilization, so the only thing that’s missing to put everything together is some software!
(Pentax has a similar version of this called Astrotracer, which uses either GPS/compass/accelerometer data or image analysis of an uncorrected exposure to determine the camera orientation. However, I think the plate-solving technique described here requires less setup/calibration and should achieve higher accuracy.)
Camera Software Architecture
The first step is to figure out how to write my own code to be executed on the camera.
Fortunately, the software update format is relatively straightforward. There is some light scrambling of the update
(the bytes within each 16-byte block have been permuted, and all the bits are flipped), which basically just prevents strings from
showing anything interesting. This allows any and all parts of the firmware to be modified.
After decoding, the software architecture is quite clear (if somewhat complicated):
- The main processor uses an MN103 architecture and runs a µITRON RTOS that does almost everything
- A Linux processor with 2 ARM Cortex‑A53 cores, running the Wi-Fi/Bluetooth stack
- A dedicated IBIS processor that also uses MN103 and runs bare-metal code
- A system controller that uses ARM Cortex-M for power management
The main processor and Linux processor are likely on the same chip, as they can communicate through a proprietary message transport using shared memory and hardware interrupts, but the IBIS processor is likely on a different chip, as it communicates through a serial link.
Since Linux has the best toolchain and supports fast debugging and iteration (including runtime code reloading), as many of the camera firmware modifications as possible are concentrated there.
Unfortunately, judging from the firmware update files, the camera doesn’t seem to have an independent method for flashing firmware, as the firmware-flashing code is just a regular main processor task. Thus, the main processor modifications are kept minimal to reduce the risk of bricking the camera.
Where is the camera pointing?
It’s possible to determine where the camera is pointing with extremely high accuracy by analyzing the stars in the image and matching them to a large catalogue of stars with known positions. This is called plate solving, and there are many different implementations of this.
The first step is to take a photo and then figure out where the stars are in the image. A Linux binary performs streaming RAW decoding and star detection. The main steps are:
- Estimate sky background and noise
- Find bright regions
- Group and screen candidates
- Measure positions
This step is mostly I/O limited. The Linux side doesn’t have direct access to the SD card, and the fastest method found was to use loopback PTP/IP transfer. This stage takes about 2 s after the image is taken and written. Then the camera sends the top 256 detected points to the phone via Bluetooth.
Once the phone receives the star pixel positions, it first performs lens correction to get corrected rays. Then, it uses the tetra3 algorithm, which searches the database for sets of 4 bright stars in the image. The database contains ~70k stars for this stage, stored by the expected field of view from the capture focal length. Once a match is found, it’s validated by matching the remaining stars against a larger database (~3M). The default database shipped with the app works for anything between an 8 mm fisheye lens (~180-degree FOV) and a 300 mm telephoto lens (~3-degree FOV) and is only 50 MB. This stage usually takes less than 20 ms, and it’s very rare that the solve fails.
End to end, the whole process takes less than 5 seconds, including capturing the image, detecting stars, Bluetooth transfer, and plate solving.
Point to what you want to shoot
Initially, the only way to orient the camera to what you want to shoot was to keep redoing the plate-solving step after adjusting the camera. That got pretty annoying quickly, especially for lenses with very narrow fields of view, where it was easy to lose track of where things are and where you need to point. Thankfully, the camera comes with very good gyroscopes already for image stabilization, and by integrating the gyro readings, it’s possible to get highly accurate real-time camera orientation readings. Over the 20 or so seconds it takes to orient the camera for a new target, the gyro integration only drifts by fractions of a degree, which is plenty accurate even with a telephoto lens.
Taking the photo
After the camera is pointed to the right spot, the camera orientation is solved again to get the maximum accuracy. Then, the phone determines the Earth’s rotation rate in the camera reference frame from the plate solve and sends that as a rate command. Fortunately, there is no need to worry too much about the low-level details, as this rate command can just be added to the existing IBIS gyro input rates, and this moves the sensor to compensate for the star movement.
The IBIS actuator has 3 degrees of freedom with a coupled-axis architecture. There’s a single axis for left/right movement and two independent up/down actuators, one on each side of the sensor. Driving those differentially rotates the sensor. The stage position seems to be controlled in a closed loop using Hall sensors.
Sensor Prepositioning
With the 300 mm lens, the sensor’s limited travel range imposes a maximum exposure time that can be as low as around 20 seconds, depending on the orientation.
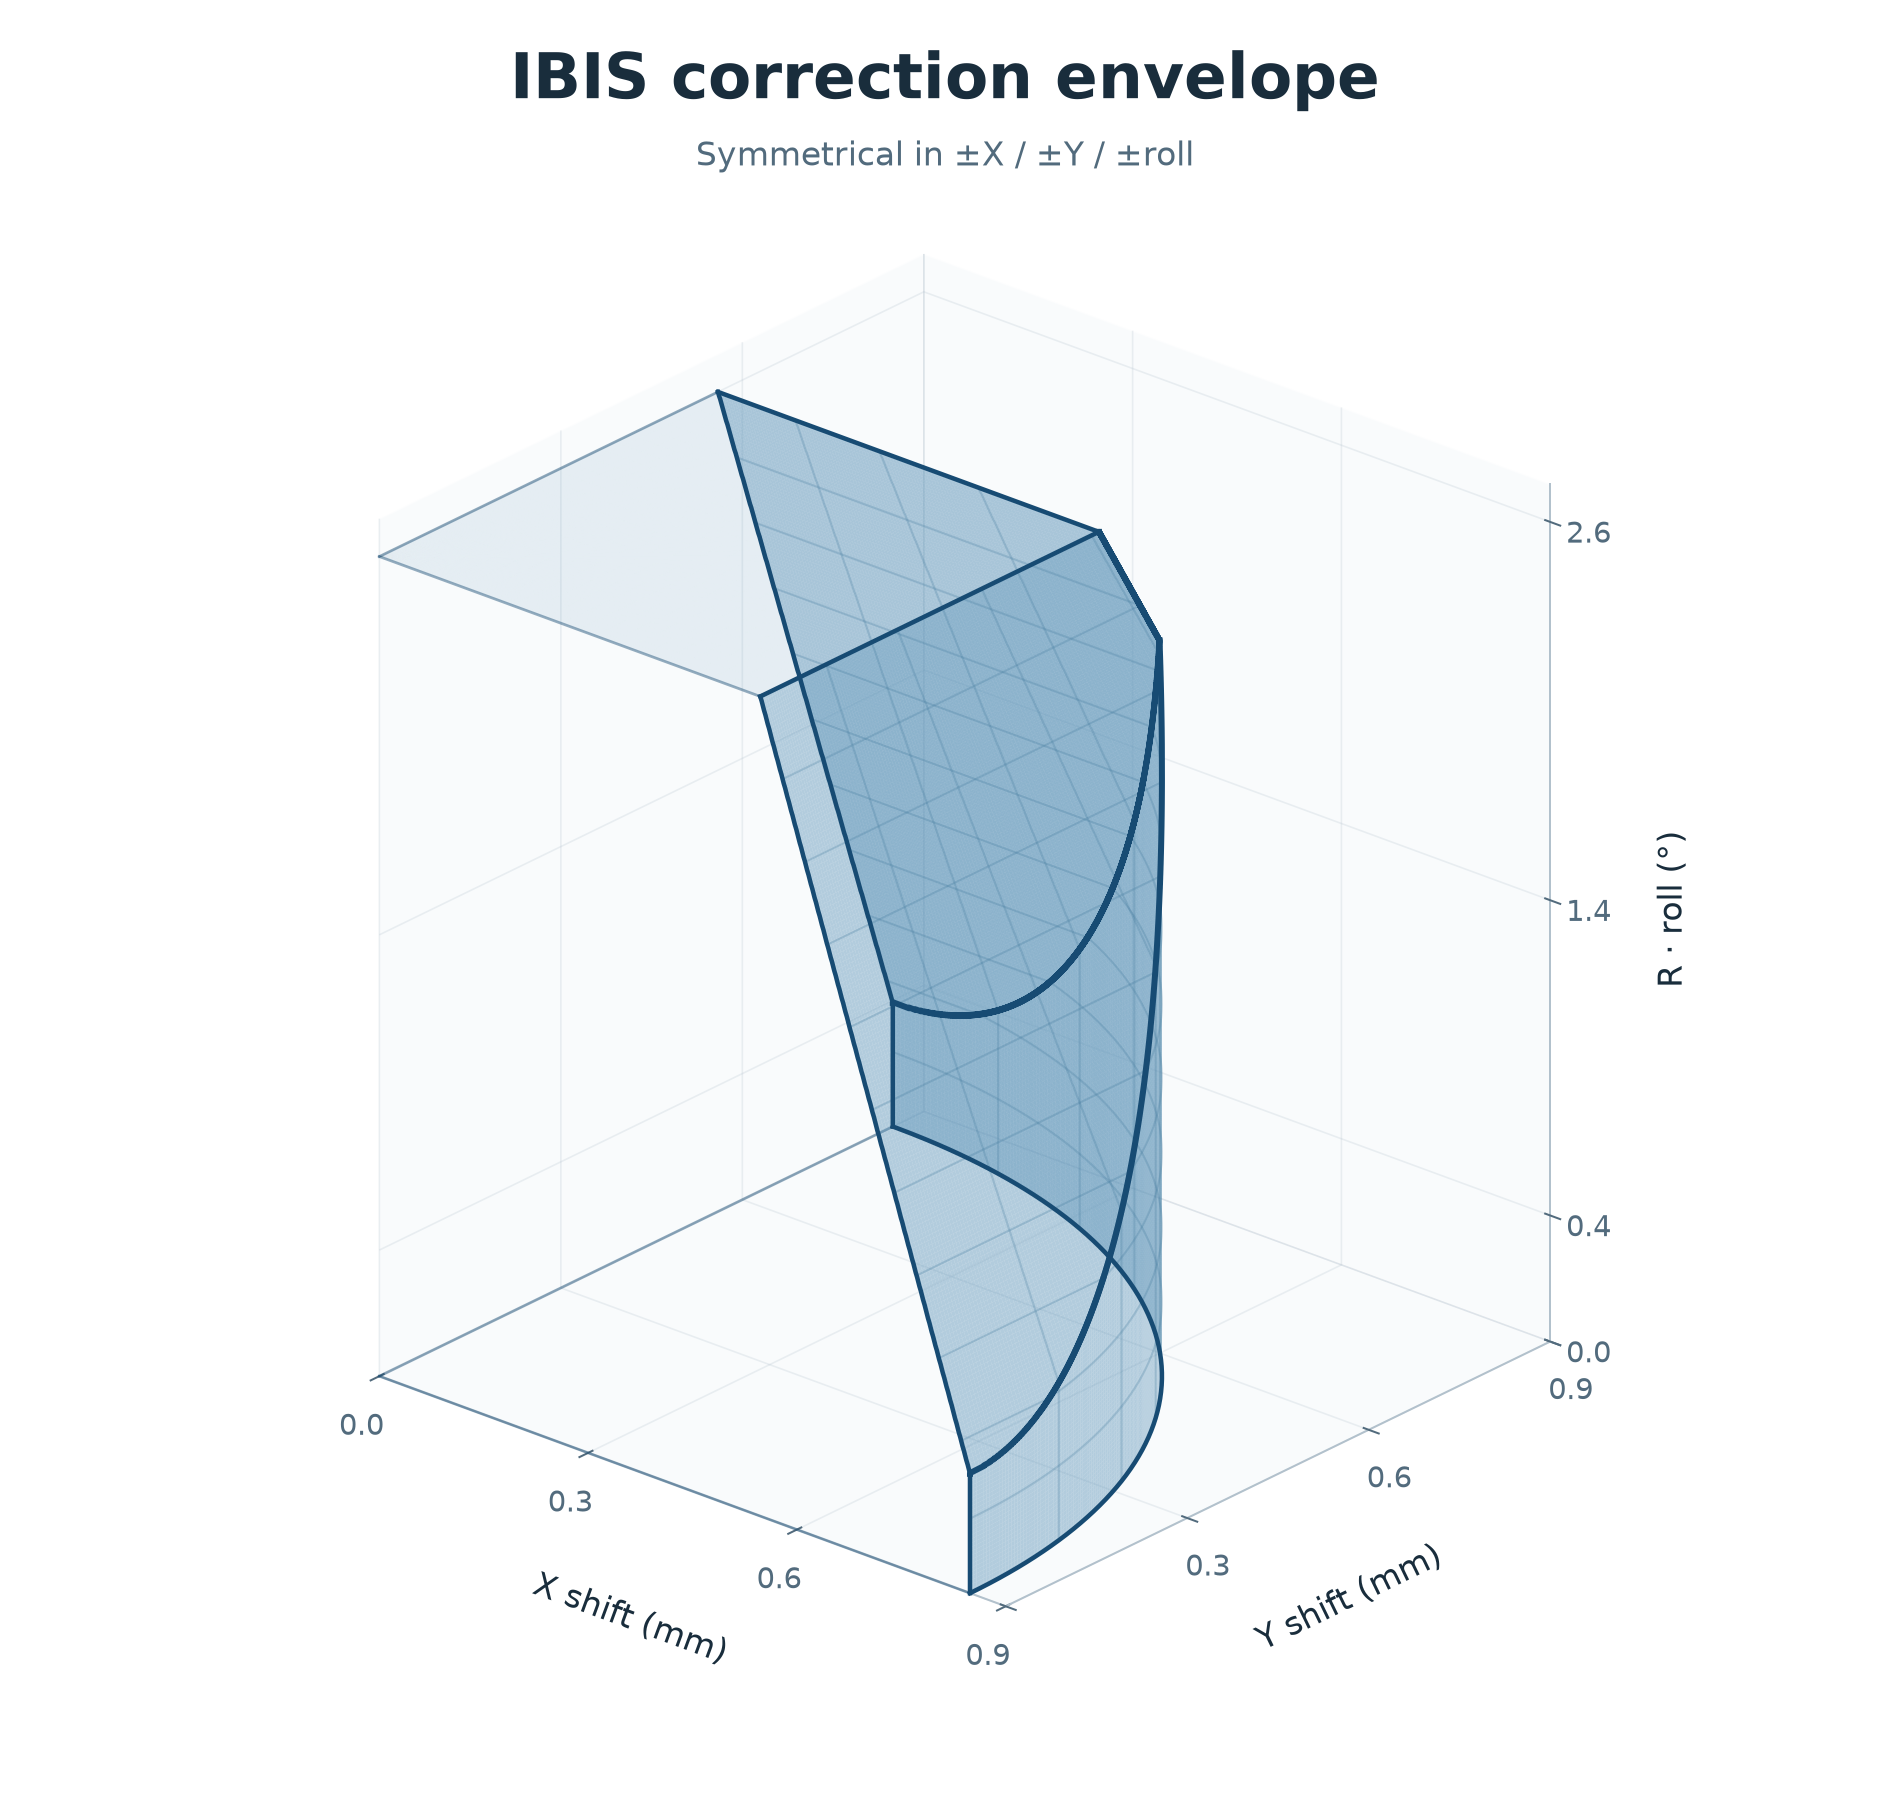
To increase the maximum exposure time, the camera sensor can be prepositioned before the exposure begins in the opposite direction of travel, so the maximum exposure time can be doubled.
Potential Errors
The long focal lengths of telephoto lenses and the small pixel pitch of the camera make this challenging. With the 300 mm lens, each pixel only spans 2.3 arcseconds (0.00063 degrees!). For scale, the Earth rotates at 15 degrees per hour (15 arcseconds/s), so there could be more than 6 pixels per second of trailing in an untracked shot.
There are several potential sources of error:
- Lens distortion
- Focal length error
- IBIS tracking error
- Pointing direction error
If there is lens distortion, even if the sensor moves perfectly, it wouldn’t be able to collect all the light from a single star into a single pixel. There’s not really any way to solve or reduce this, and this is a fundamental limitation of any IBIS-based tracking system. Fortunately, the longest lens I have, the Olympus 300 mm f/4, has almost non-existent distortion.
There is some focal length variation with focus and probably also between different copies of the same lens. The lens does provide a focal length readout, but using the plate solve, it’s possible to get a much more accurate focal length, which essentially eliminates this term.
Even if we know exactly how to command the sensor to move, there is still likely some error in the mapping between the Hall sensor feedback and the actual position of the sensor. This term seems to be calibrated in the factory and is quite accurate.
The last main source of error is uncertainty about where the camera is pointing. If there is an error here, the camera will be tracking the sky at the wrong rate. To have a subpixel pointing error with the 300 mm lens and 60 seconds of integration, the pointing error needs to be less than 8 arcminutes (0.14 degrees). This is easily achieved with the plate solve, which also has a nice advantage: longer focal lengths require higher accuracy, but its accuracy also naturally increases with focal length.
Tripod
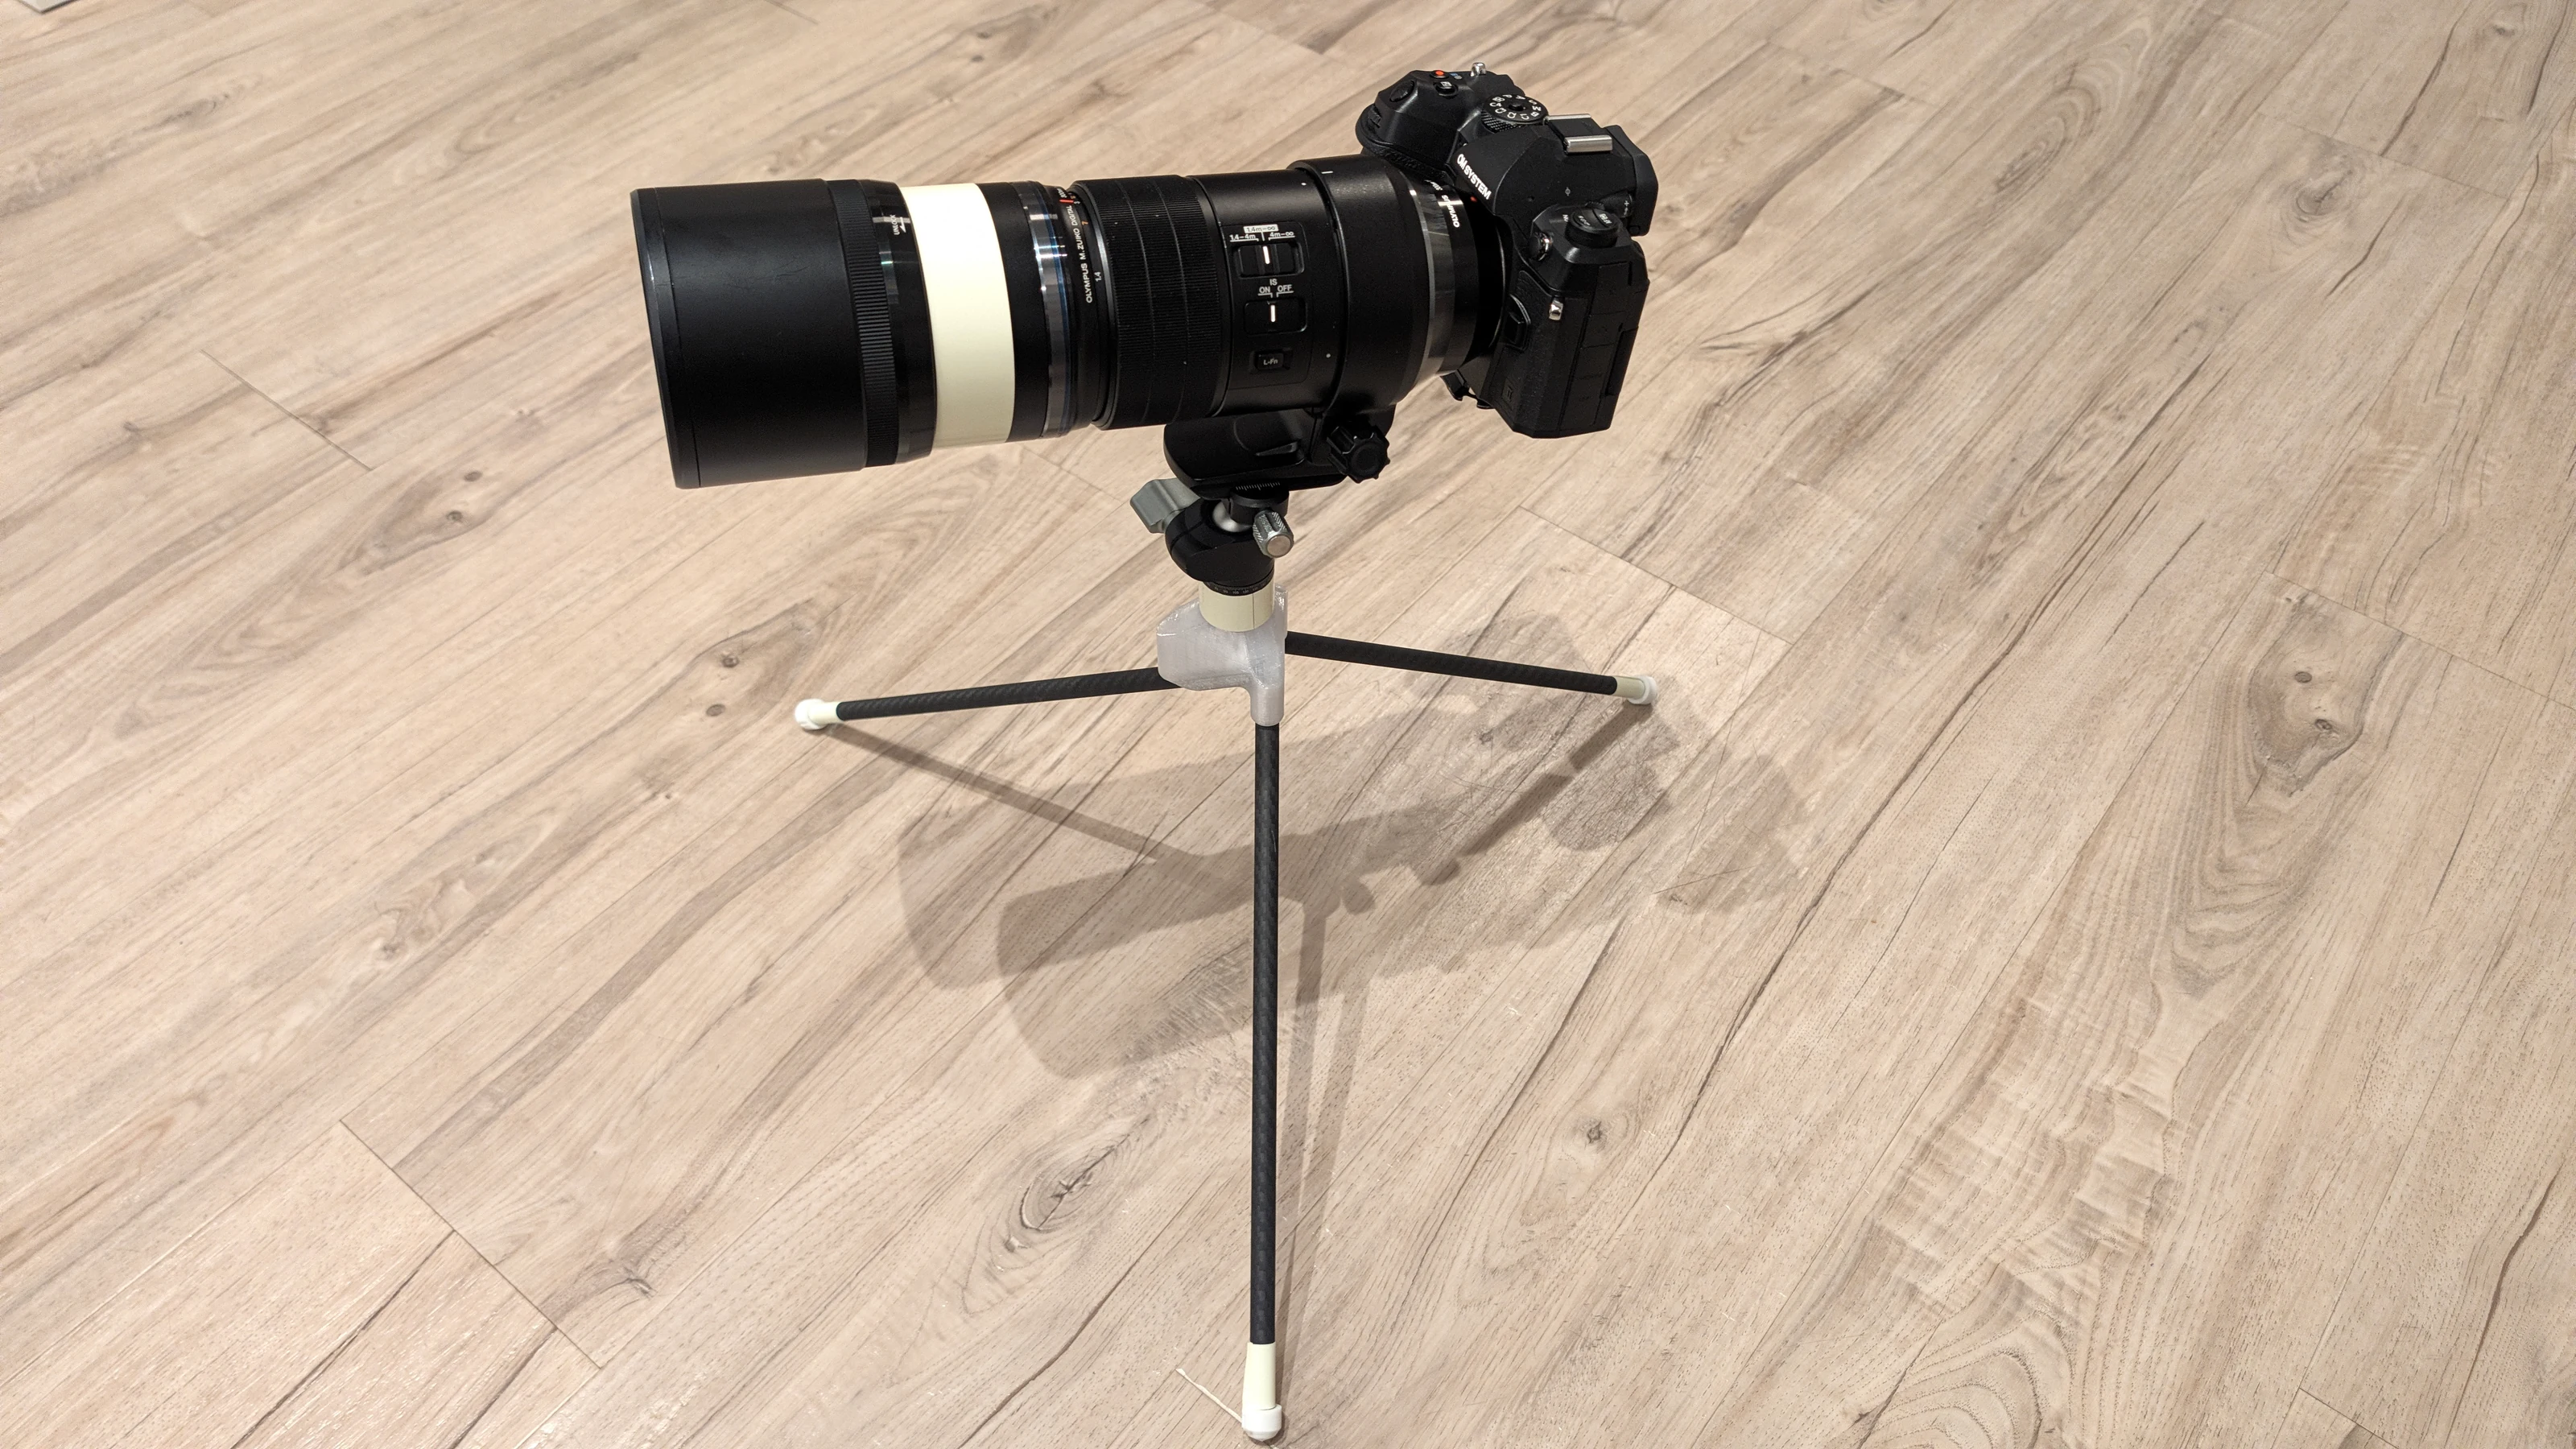
Tripod with camera and 300 mm f/4 lens.
One other source of error is the camera not being held perfectly stationary by the tripod. I’m sure you can buy nice tripods which will do the job, but I wanted a light and compact tripod with very high stiffness. The height and adjustability of most tripods on the market are counterproductive for this, as holding the camera higher off the ground makes it more difficult to support, and adjustability means more moving parts and potential for deflection.
I designed a simple tripod made from a ball head, a 3D-printed polycarbonate hub, and short carbon fiber rods press-fit into the hub. I think it should be the most stable tripod for its weight (210 g total, including the ball head). The ergonomics of using this are obviously not as good as those of a taller tripod, but adjusting most settings and capturing photos can be done in the app, so there’s no need to use the camera on the tripod too much. All the photos in this post are captured using this tripod.
Results
The whole system works quite well! It only takes a minute or so to turn the camera on, focus, and point it at any target in the sky. It can reliably capture 60-second exposures at 300 mm (IBIS travel permitting) with almost perfectly sharp stars.
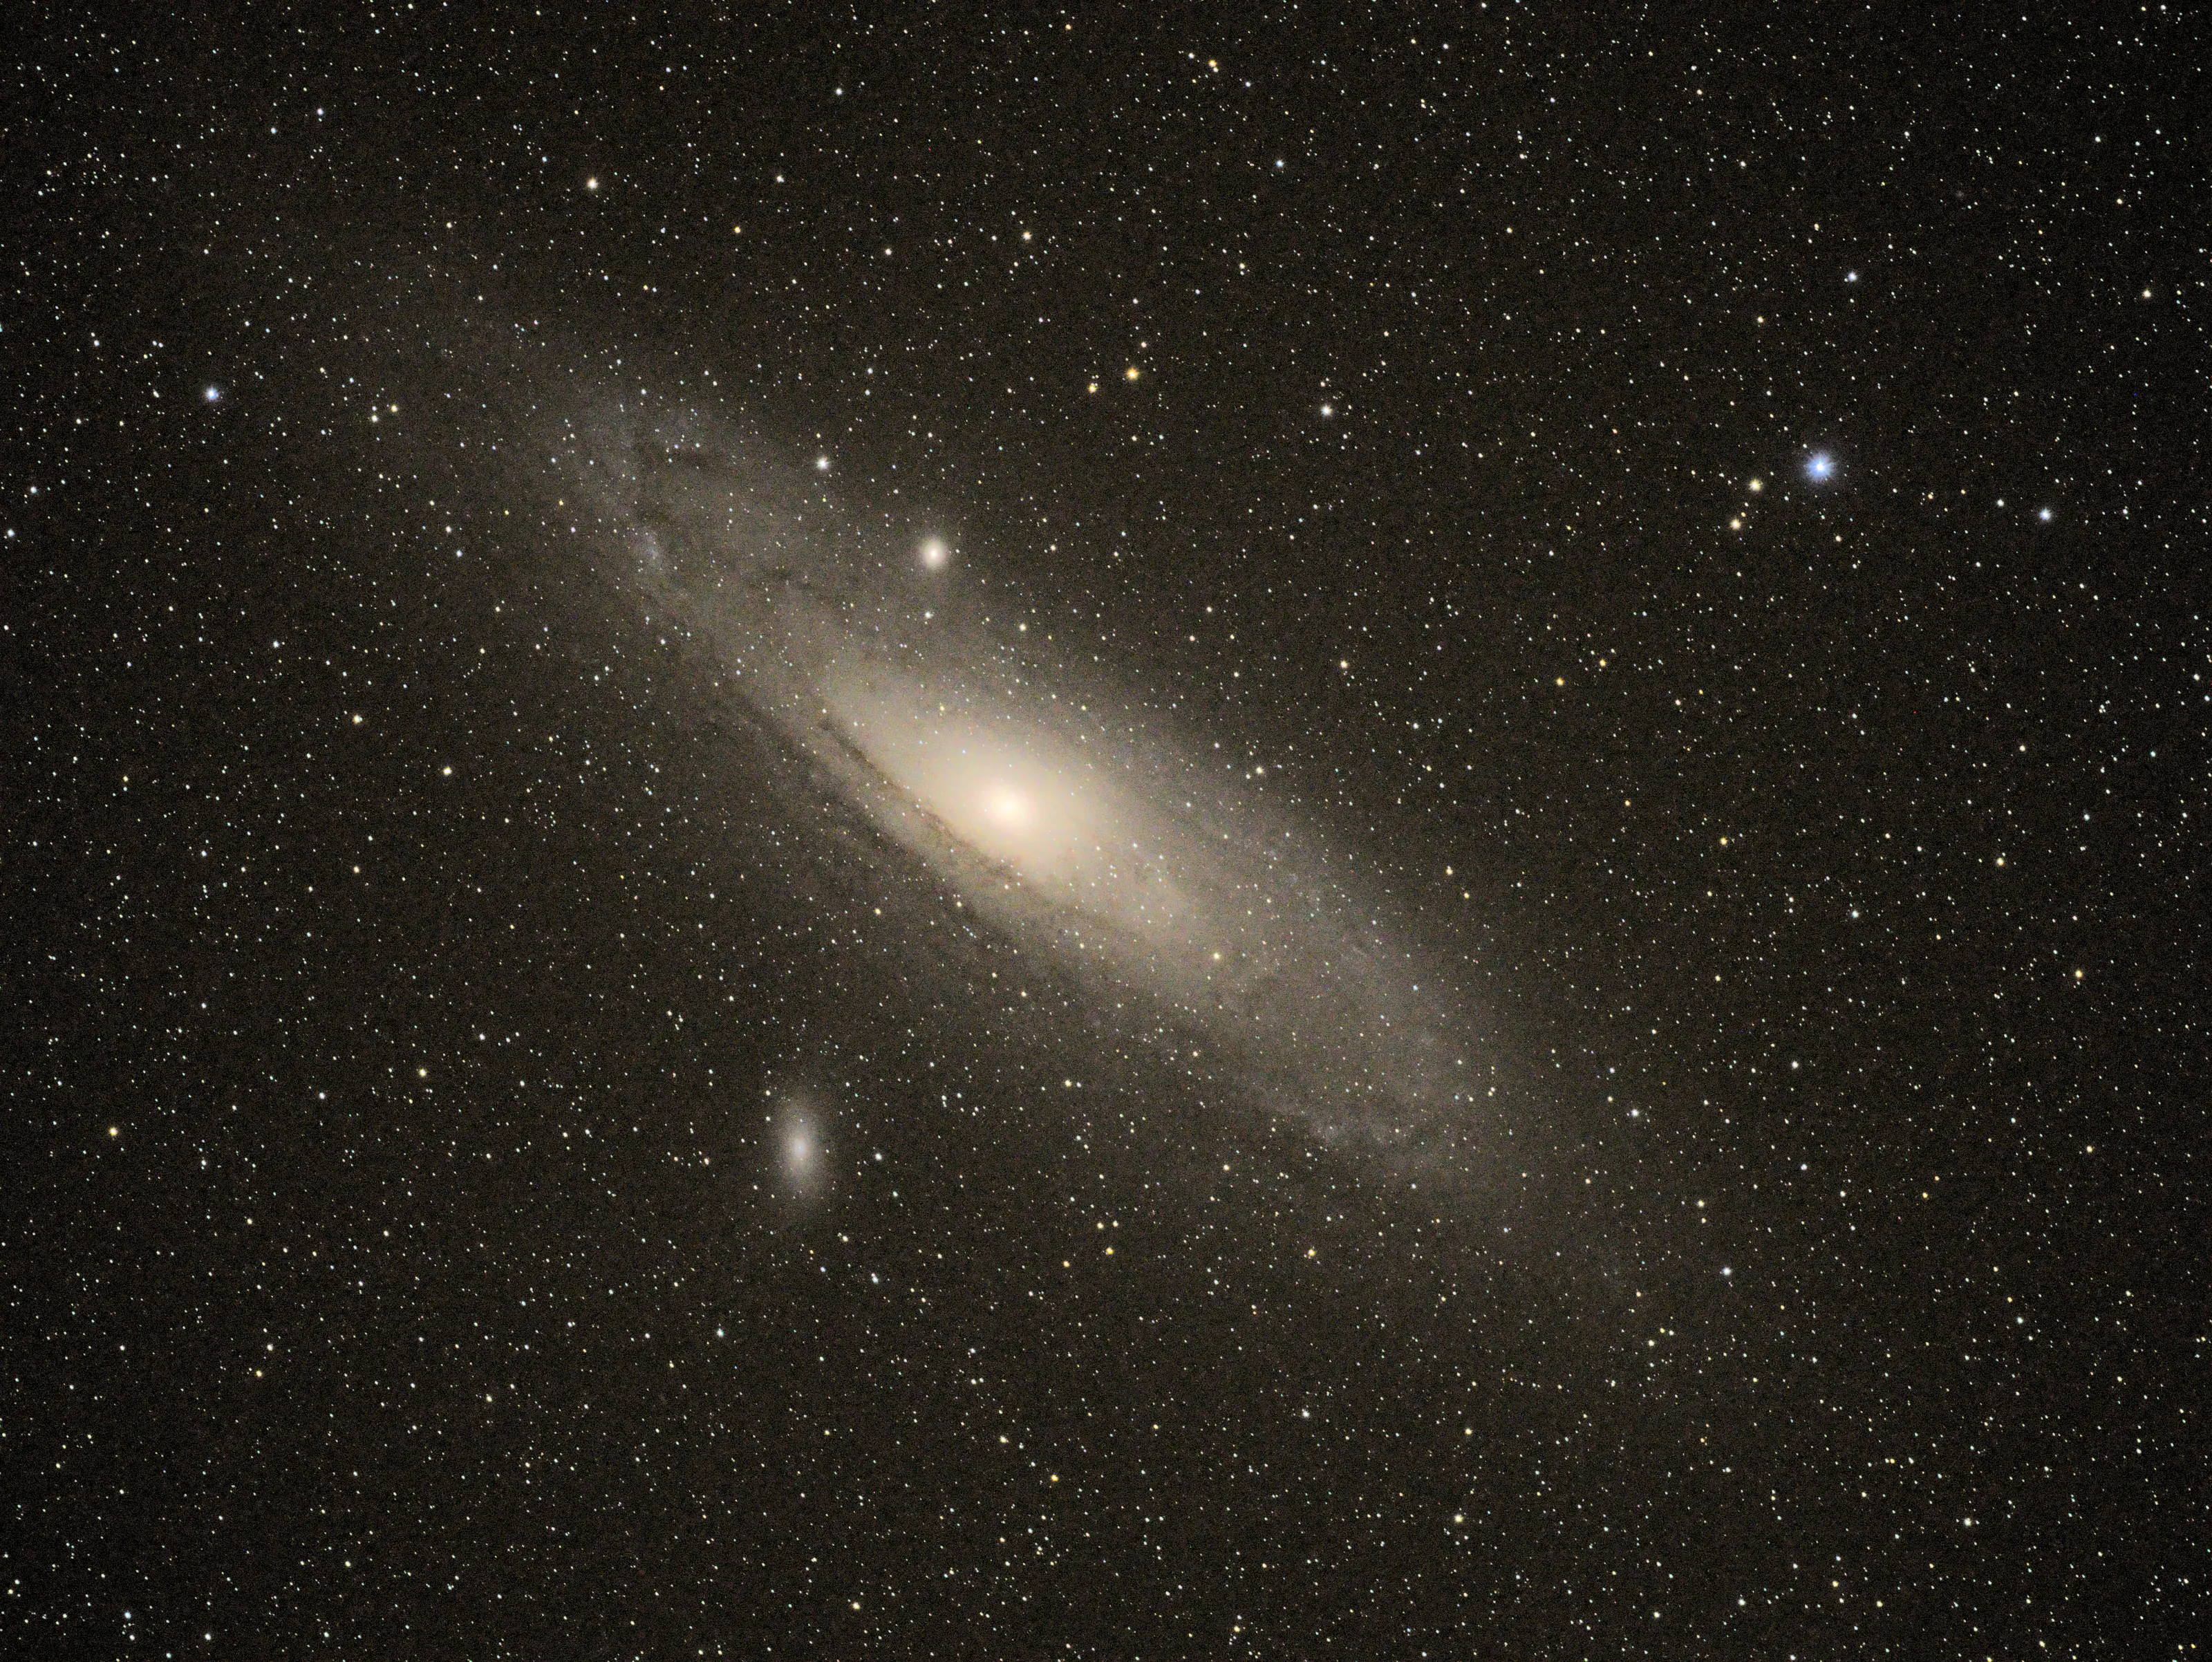
Andromeda from Elephant Butte, NM. ISO 3200, 300 mm f/4.0, 50 s single exposure. Processed in darktable with astrophoto denoise, chromatic aberration correction, a tone curve, and saturation adjustments. Full-resolution PNG RAW file
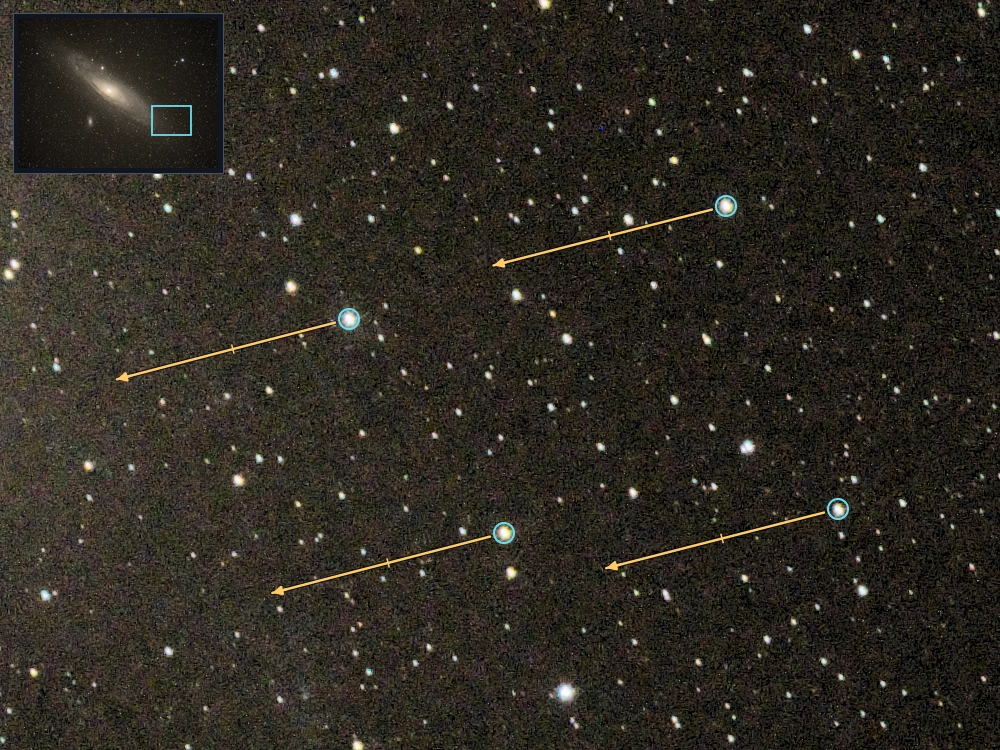
For scale, here’s a crop of the original image, showing how far the stars would have moved during the exposure without tracking.
Screen recording of the app, showing plate solve latency and live pointing feedback from gyro integration.